
Types of Core Exercises
Hey everyone,
Thanks for looking at my massive core exercise guide. Yes, there are tons of video examples (BELOW) for you people looking for the best and most effective core exercises, but I must warn you that if you’re new to exercise or working with an injury, you need to be examined at a sports medicine clinic or by a fitness professional before you add any of these concepts to your training.
Within this core exercises guide, we’ll be covering many different types of core training, some of which I don’t like and some I love. Over the years, the medical and coaching profession has changed their views on what effective core training is. First, I’ll bring them all together for you in the beginning of this guide, then I’ll separate them out. The intro is going to be lengthy, but worth it. Most people’s understanding of how to train their core is very low. I need to get us all on the same page before we dig deeper.
Here’s a quick link to all of the exercise galleries for you impatient ones out there: (LINKS)

OLD CORE“6 PACK” THEORY
Much of the general population live and die by some very archaic core training methods:
- Six Pack Training
- 8 Minute Abs
- Electrotherapy for Ab Strength
- The Sit-Up
I would NEVER recommend any of these methods to a client.
This isn’t just my personal belief; over 95% of fitness and sports medicine professionals feel the same way. Experts in the fields of spinal biomechanics, injury prevention, sports performance and rehabilitation all echo this sentiment, and I’ve spoken personally to a number of them, so I don’t think I’m just going out on a limb here. You’ll see some names within this guide that you can cross reference if you’d like.
Having six pack abs has nothing to do with having a functional core.
Most people desire the aesthetics that go along with core training, but as trainers, coaches and healthcare professionals, we would be negligent to allow this madness to continue.
DISCLAIMER: With that being said, if you’re reading this article for a killer six pack ab workout, you may as well leave now, I’ll only disappoint you. But if you want to learn how to properly train your core then please stay. I wrote this article for open-minded people looking for most current theories and methods.
OLD THOUGHT – “BELLY & BACK”
The next “core exercise theory” people tend to believe is that the core is only the belly and back muscles. While this theory still isn’t current, it’s significantly better than the six pack theory. If you’re focusing your core training on the following muscles then you’ll probably fall within this group:
- The transverse abdominus
- The internal oblique
- The external oblique
- The quadratus lumborum
- The erector spinae
This theory limits the region of the core to just the areas around the low back and belly. Based upon the works of some of the greatest minds of our time, we now know there’s a lot more to it
MORE CURRENT THOUGHTS
Let’s get a current core theory starting in this section.
A bit of terminology has been thrown around this current concept, but I really like Pillar Strength, a term coined by Core Performance (currently EXOS). Some of the other terms that would echo the similar positive results are:
- Midline Stabilization
- Stone and Hammer
- Bow and Arrow
- Anti-Rotational Training
Using the term “pillar” better describes the core from a functional standpoint, rather than just a section of the body, which is how most people think of it. All these other terms also account for the correct anatomical section of the body, but they’re better used as descriptions of how we should train or use the region.
My personal preference is to use “pillar”, but some really great healthcare and fitness professionals that I know use the other terms. To each their own.
The term “pillar” also gives us something new to focus on rather than the “back and belly” core term we previously used.
Core + Hips + Shoulders + Breathing = Pillar
I’ve used the term Midline Stabilization a bit recently, which I believe was coined by Kolar within Dynamic Neuromuscular Stabilization (DNS). When I do, I find that my patients will often stare at me in confusion….“So my midline is where???”
While I have no issue with these other terms, I believe giving people a term that’s more descriptive of a region of the body better answers the question, “so what muscle does this train?” and this is great for morale.
When the pillar is functioning well, it’s stable at the correct time. Stabilization is a FUNCTION of the pillar.
The term pillar gives people a reference they can visualize as a region of the body during training, but we’re really training movements.
So from now on when you say “core”, I want you to slap yourself in the face and correct yourself by saying “pillar.”
- Breathing (Diaphragm, Pelvic Floor, & Patterns)
- Hip Joint (Mobility, Stability, & Soft Tissue Function)
- Shoulder Joint (Mobility, Stability, & Soft Tissue Function)
This model recognizes what the traditional core model doesn’t.
We now understand that breathing, in addition to the ball & socket joint complexes above and below, are part of the pillar system. Logically then, we can no longer assume that a “syndrome” or tightness of the muscles crossing the shoulders and hips occurs without a correlation to the pillar system.
- Piriformis
- Pelvic Floor
- Hip Flexors
- Hamstrings
- Pectoralis
- Lats
- Upper Traps
If we have a “syndrome”, then we need to assess the whole pillar system. Note that many of the muscles that are always “tight” are tonic muscles.

PILLAR CORE EXERCISE
How the Pillar Core Exercises Fit into Primal Movements and Midline Stabilization
Now we know our focus is on the pillar system, but how exactly does it function?
Like I said before, the pillar is a great way to describe the location/region of the body we are talking about, but we can jump to a few new terms to understand better how it functions. Midline Stabilization is a great term for this.

The midline of the body is found within the center of the pillar (think spine). Stabilization is the body’s ability to be in the desired position, at the the desired time, with the desired tension. The appropriate amount of stabilization is what allows us to lift weights and do yoga all with the same pillar.
Midline stabilization is first acquired through our development as children exploring the world from the ground up. Primal movements, such as “tummy time,” rolling, crawling, reaching, and our first attempts to walk are all examples of some primal movements that are required for development of stabilization of the pillar system.
When we become adults, sedentary ones especially, we lose these abilities and along with this, some midline stabilization. Revisiting some of these movements can assist us in regaining a functional pillar system. After the basics are mastered again, then the fun can really begin!
Only after we’ve regained our midline stabilization can we jump into things such as:
- Power Development
- Exhausted Exercise (ie: HIITs)
- Medicine Ball Work
- Olympic Lifting
- Crossfit Workouts
TRAIN A SOLID PILLAR
Recently at a seminar I attended, Mark Verstegen, the founder of Athletes’ Performance, noted the following progression in his presentation:
- Position
- Pattern
- Power
These Three Ps, in this order, are what’s required to have a powerful pillar system. Skipping any level will result in an increased injury risk, lower performance, and frustration.
Training the person to find the correct positions, followed by moving through those positions and then moving with power is optimal. Think training standing on two feet, before standing on one, before walking, before jogging, before sprinting…it’s a process.

The pillar system is best trained via movements, not muscle-centric training. The bodybuilding era of Arnold conditioned us to think movement begins with the muscles. I trained this same way when I was in high school. We trained one joint at a time, looking to isolate muscles for growth.
I wasn’t training the pillar.
- Rather than bench pressing, I should have been pushing sleds.
- Rather than doing knee extension on a machine, I should have been front or back squatting.
- Rather than doing the Booty Blaster, I should have been doing Standing Rotational Rows with 1 Arm.
These are examples of single joint exercises versus compound exercises.
Compound exercises and movements (if not done on a gym machine) require stiffness of the pillar through the “core.” As Stuart McGill says, the trunk (back and belly region) is composed of a sophisticated guy-wire system designed to create spinal stiffness when needed.
During a back squat, a stiff torso is required to prevent the weight from crushing our spine. Squatting requires the powerful hips to drive our feet against the ground to push the weight up through the stiffened midsection. The hips are part of the pillar system, remember?
In the back squat example, here’s a few things we are training all at the same time:
- The Central Nervous System
- Torso stiffness
- Breathing & Intra-abdominal Pressure
- Powerful Hips
- Foot Stability
- Knee Position
Training movement is more than just muscle growth. Did you notice I didn’t name any muscles in the last list? That’s because to have a functioning core, we need to focus on FUNCTION rather than “what muscle is this training?”
By training movement, we learn to control our body so we don’t turn our ankle, twist our knee or hurt our back. From the inception of core training, it’s always been about function, but people have interpreted it as looking lean. Movement starts with the central nervous system (brain and spinal cord), not the muscles.
Here’s the easy part: you can think of training the central nervous system (CNS) in the same fashion as you thought about training muscle growth.
Muscles grow via repetition and load. The CNS does the same thing with movements. The more frequently movements are practiced, the more the CNS builds robustness in the neurological pathways that allow movement to occur seamlessly. The more work you put in, the more rewards you reap!

Our bodies are resourceful. They will use every available resource to solidify the neurological pathways that you use the most. These changes are called positive neuroplastic changes.
Here’s some examples of neurological pathways you’ve built-up with movements you do frequently:
Walking:
Walking is something we do everyday, so our nervous system has built a solid ability to do it. If you haven’t walked in a few days, you don’t forget how to do it. The more often we use a movement, the better the ability we have to do it well.
On the flipside, if you’ve walked with a limp for years, it won’t go away overnight regardless if your knee is repaired or if your pain decreases. Walking normally again needs to be practiced over and over again to override the limp. Core training is the same way; if we do it the wrong way, it’s not helpful.
Driving a Car:
Knowing how to drive a stick is something I don’t think I’ll ever fully forget, but since I’ve now had an automatic for about four years, I may need a few minutes to practice again before I’m perfect. I had a stick for 13 years.
When I first started driving stick, I had to direct all of my attention to “clutch, shift, gas”, but after a few years, I was able to downshift, drink a coffee and talk to the person in the passenger seat all at the same time. I was more conditioned at the movement “dance” of a stick shift car. Core training is the same way; the more you do it throughout your life, the quicker and easier it will return.
Jumping and Skipping:
Just kidding. I thought jumping and skipping would be excellent examples of things we could do as kids that we now suck at as adults. In fact, I’ve observed females in bootcamps deathly afraid of jumping onto a small box no more than six inches high.
Most people learn these basic movements when they’re young, but stop doing them before high school. These neurological pathways have been dismantled and their materials repurposed to movements like driving and walking, which you do more frequently.
What’s the point?
How can we do this?
- Train compound movements
- Train the core isometrically
- Train your breathing patterns
- Train the primal movements you’ve lost from your childhood
- Train for anti-rotation for your sports performance
What does this all mean?
Train your movements well and your body will be conditioned to move well in life; that really is the whole point of core training. If you’re looking for a shredded stomach, remember this: “abs are made in the kitchen, glutes are made in the gym.”
If you train your core for function, you’ll feel better, have less pain throughout life and be a faster, more powerful athlete. This is the only type of core training that transfers to the field… THE ONE AND ONLY.
Training to have stiffness of the torso with pillar training will teach your midsection to not cave under the weight on your shoulders. It also facilitates proper posture and allows you to generate more power from the ground drive, through the pillar and to the arms. This is how we generate power to baseballs, barbells, and even boxes of cereal.
ANIT-ROTATION & SPORT PERFORMANCE
Important section (click links to read immediately):
- Graphic on how it works
- Anatomy
- How it happens
- How to rehab
The last stop in the evolution of core performance is anti-rotation.
Sprinting is as straight as it gets. But sprinting still has a large rotational component–we just don’t see it. The reason a sprinter travels in a straight line is because they’ve trained their body to re-direct the rotational power into going 100 meters in the straightest line possible.
If we look at the muscles that generate power from the hip, we see they are all slightly oblique in orientation. The force and vector of their contractions would pull a sprinter into zigzag sprints if they never trained to be anti-rotational. So, generation of power and force in sports is more about anti-rotation and that transfer of energy.
(PIC OF THE GLUT MAX ORIENTATION)
Rotational power has much to do with Kinetic Linking – Hip, Trunk, Arm, Club or Bat at impact. It’s all about the muscle pulsing. Energy leaking affects how well we can link, accelerate and decelerate body regions. Energy leaks occur if we can’t properly slow a region of the body and transfer the energy to the next region in the linkage model.
The ability to decelerate rotation is critical. We call this anti-rotation. In sports performance, as well as injury prevention, we commonly assess the person’s ability to stall or halt rotational forces.
Fun Fact: The inability to control inward rotation of the thigh and shin bones are the reasons behind non-traumatic knee injuries.
Back to the sprinting example: can the body resist the rotational forces generated by the powerful glutes and transfer that energy to the ground? Or will that energy be lost somewhere in the leg? (think the ACL example)
The Law of Conservation of Energy states that energy can’t be created or destroyed. The energy created by your body’s fuel manifests as muscle contractions, which then are transferred to the ground through the foot. But it can also be lost within the knee ligaments, resulting in tendonitis or other types of knee injuries.
By maximizing our ability to sprint efficiently, we also decrease our injury risk. This principle applies to all human motions. Gravity and the laws of physics are extremely consistent.
“When you buy a sports car you should save money in the budget for the breaks.” – Mark Verstegen, Core Performance
This quote is gold. When most people train, they spend all their time building an engine, when they should really be starting with a sturdy frame and some breaks.
Training the pillar system and anti-rotation through movement drills cover the car’s frame and breaks.
Within this guide, I’ve dedicated a whole section to anti-rotation and single leg stance.
___________________
Credit to some of the great minds: Stewart McGill, Pavel Kolar, Paul Chek, Dan John, Kelly Starrett, Mark Verstegen, Richard Ulm …. and many more.
CONDITIONS CREATED CORE ISSUES
- Non-trauma Low Back Pain (Disc Herniations, Facet Syndrome, Osteoarthritis, Degeneration, etc)
- Non-trauma Knee Pain (ACL, Meniscus Injury, Patellofemoral Pain, Pes Anserinus, Tendonitis, Bursitis, etc)
- Non-trauma Hip Pain (Impingement, Hip Labral Tears, Tendonitis, Bursitis, Hip Flexor Syndrome, Piriformis Syndrome, etc)
- Non-trauma Shoulder Pain (Impingement, Bursitis, Tendonitis, Rotator Cuff tears, Glenoid Labral Tears, etc)
- Neck Pain (Discogenic Pain, Facet Syndrome, Cervical Radiculopathy, Tight neck muscles, Osteoarthritis, Degeneration, etc)
- Midback Pain (Shoulder Blade muscle tightness, Osteoarthritis, Degeneration, trigger points)

I won’t go into the full details of each condition because it would become redundant, but I will say this: if your pillar lacks the ability to stay stable, then your joints, muscles, tendons, bony surfaces, ligaments, and cartilages will breakdown, degenerate or tear from your so-called “overuse” or “age related” conditions.
As you can tell, my belief is that “overuse” and “age related” aren’t valid reasons for defeat. By realizing that your body is resilient and desires pillar training to feel better, you will become empowered.
ISOMETRIC HOLDS
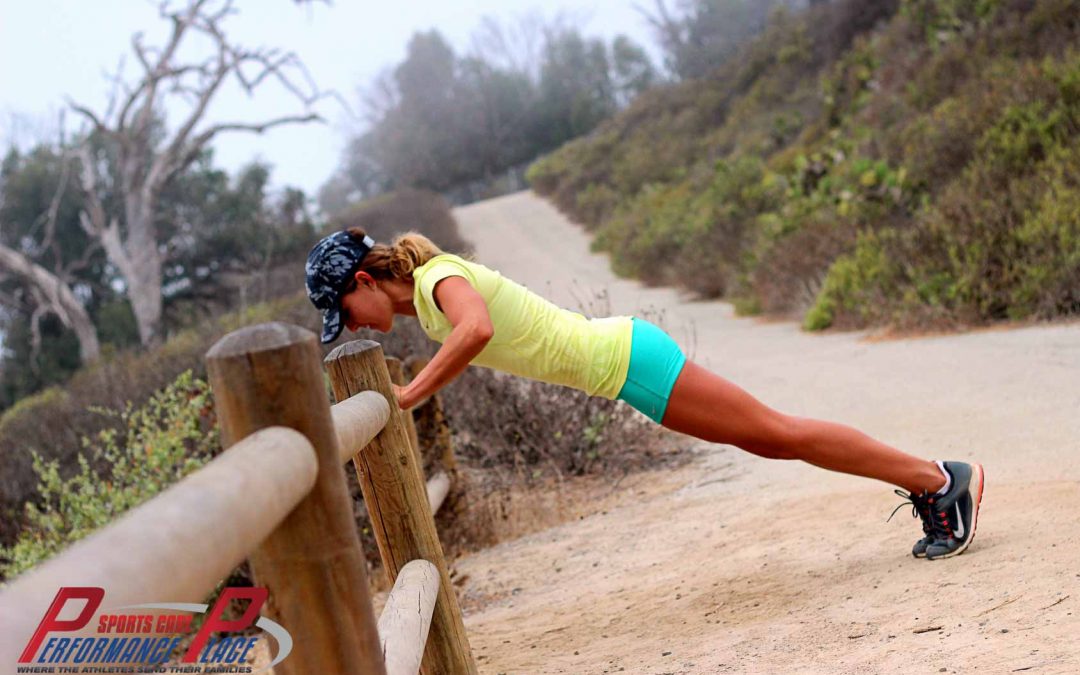
Isometric holds can be used as a core program in the beginning stages. This helps us build the pillar’s robustness. You’ve probably heard of one of the more famous isometric core exercises, the plank. But did you know you can even hurt yourself doing a plank? Look around at the gym next time and see the huge variation in people’s plank forms.
When someone comes into my office with or without an injury, I test their ability to keep their pillar in one position for timed holds. If they come to my facility in pain, but can find a pain-free plank starting position, then I proceed with the test. If they then slowly develop pain and deviate from the starting position, I know their ability to hold their pillar in the plank position is very low. They have low endurance, but we know they have the mobility to find a pain-free position.
This is great news. This means the spine isn’t damaged, it’s just being loaded or positioned poorly. Most people who can’t keep their optimal position against gravity are destined for an injury. Isometric floor core exercise is a fundamental building block to having a bad-ass pillar system. If you can’t hold proper position while on the ground, how can we do it when standing?
Here’s are some of my favorite isometric core exercises (thanks for your work Dr. McGill)
- Birddog Progressions
- McGill Curl Up
- Side Bridge Progressions
- Stir the Pot
- Pallof Press Variations
- Bridge Progressions
- Deadbug Variations
I’ll give some video samples of them at the end of this section.
Before we get into these exercises, I think I have a responsibility to discuss intra-abdominal pressure or as Dan John calls it, “Anaconda Strength.” Dan explains this on my podcast as an inner tube. We blow it up from the center, and all of the sides expand at the same rate to stabilize the tire so we can place weight on it.
Simple right?

Intra-abdominal Pressure
It all starts with breathing.
Breathing is typically an involuntary action, but we can learn to do it poorly over time. Breathing poorly? Come on, right? Funny, I’ve actually had a patient nearly walk out of my office when I told him we were learning to breathe today! But our body learns poor habits with many things if we don’t give it a crash course every once in awhile.
- Posture
- Digestion
- Sleep
How many people have issues with posture?
How many people have bowel issues?
How many people do you know who have insomnia?
Crap, now that I think about it, how many people do you know who need to use a breathing mask to force oxygen down into their lungs as they sleep?! Don’t tell me we all breathe well!
The great news is, we can learn how to breathe quickly with practice, and in turn, we will also develop a better pillar system.
When we’re attempting to place load upon the body, we want the pillar to become rigid so we don’t break the flexible rod that we all know as the spine (credit Dr. McGill). When placing load/weights or repeated small loads, we need some aspect of internal pressure to make the pillar more like an iron rod–less flexible and more able to take the weight without being damaged.
Proper breathing functions similar to a syringe. When we are drawing medication from a bottle via a needle, we pull back on the syringe plunger, and the medication is sucked in. This occurs via vacuum forces created by the movement of the plunger.
Your diaphragm is the plunger and the medication is air. Optimal pressure occurs via negative pressure created by the vacuum effect of a horizontal, downward moving diaphragm on inhalation.
As a side effect of this, the diaphragm compresses the abdominal contents and increases the pressure in the cavity…resulting in a stiffened pillar.
Here’s some great videos of how we can test and train proper intra-abdominal pressure through core exercises:
Tension and Tension Gradients
Proper pillar work accounts for these principles. There’s a time and place for high tension and intra-abdominal pressure. There’s also a gradient of tension/pressure. Dan John speaks about this in our podcast. When we teach proper pillar stabilization, we also teach the gradient.
I teach gradients of tension in a clinical setting to people who don’t know how to regulate their tension. They need to learn how to use their “tension dimmer switch.” One way we do this is with Seated Water Bottle Steals (exercise gallery)
I tell them to crush the bottle as an anaconda crushing its prey. Crush it from all sides, not just the hands. This includes the belly, the forearms, trunk, lats etc.
Another exercise I like to use to show max tension is a Push-up Position Planks with Arm Grabs, something taken from Dan John again (Exercise Video Gallery). I start by asking the client to give their best plank in a push-up position. Then I place my hand around their forearm and tell them that I’m going to try and pull their palm off the ground. Their job is to not let me; they need to keep their palm glued to the ground.
As I start to pull up, they’ll begin to slowly increase their tension. It’s nearly foolproof. After they’ve struggled for a good five seconds, we then establish this as their 10/10. So, we can do tension gradient checks a few ways. Just pick what one works best for the person.
During the Water Bottle Steals, I attempt to steal the bottle, and duh…their tension goes to the real 10/10 again. Knowing how to regulate tension is extremely useful in daily tasks.
- A deadlift 1 RM requires 10/10
- A golf swing is more of a 7/10
- Doing Yoga is around a 3/10
- Walking is around a 3/10
You get the point?
The tension you’ll feel with the Water Bottle Steals is global. By this I mean that you’ll tense up your whole body. This is a great start, but realistically, when we move throughout life we require high tension in different regions of the body at different times. Muscular contraction always increases a joint’s stability, but 10/10 stability is not always desirable.

Even though the deadlift 1RM requires high torso tension, the hips move, so their tension is much lower or else the joints would lock-up. This is a whole other concept for another time; when I have time to write an article about it, I’ll place it HERE.
Back to the isometric pillar work…
Perfect practice makes perfect. This concept will assist you in understanding Threshold Training later in this article. Training the core is like training anything else, if you practice poor habits, then your habits are poor. I recently worked with a pediatrician on her deadlift. I asked her to do five reps one day of a certain weight and she had poor form on two of them and it was very light weight.
I asked her this, “What do you do every day at work and NEVER mess up on?”
“Circumcisions,” she said.
I replied, “Well, every one of your deadlifting reps is now a circumcision…never mess up. I want perfection.”
That’s the truth! Finding optimal POSITION and HOLDING IT when performing core work on the ground is the NUMBER ONE GOAL. I don’t care if you can hold a plank for five minutes unless you can hold my cup of coffee on your back without spilling it the entire time.
Working on your intra-abdominal pressure will assist in keeping midline stabilization so that we can move on to standing pillar work.
Here are a few exercises that I start with, even people with injuries, to build inner strength (keep in mind that I have tested them for risk first, as some injury types can’t tolerate this type of rehab yet).
- Water Bottle Hugs (Dan John)
- Push-up Position Planks with Arm Grabs (Dan John)
- Seated Water Bottle Steals (Sebastian Gonzales Original)
- Balloon Breathing
- Goblet Squat “Pumps” (Dan John)
- Deadlift Holds
There are many other exercises that we can use, but these are just a few I like. Below are some videos of each. I apologize that they are all separated, but I think each merits its own explanation. Most people who tell me these videos are too long to learn a simple exercise typically move in a way that is less than optimal; unfortunately, they will continue to have a poor-functioning core because they haven’t spent the proper time to understand the movement or gone to a professional for some legit cueing. Enjoy!

DYNAMIC CORE
The opposite of isometric core work is dynamic core work. Dynamic core programs allow the pillar to twist and flex, which allows the spine to be subjected to damage. Some of you may still do some of these types of core exercises without pain, but I can almost promise you it will catch up with you. Read Dr. Stuart McGill’s book, Spine Mechanic, for a more detailed explanation of why.
Yes, you’ll develop a larger six pack with dynamic core programs, but six packs don’t translate to high performance or injury prevention. I’ll say that again: there’s no carry over, unless your sport requires that specific type of motion or abdominal hypertrophy.

Personally, I never program dynamic core work for my clients. An isometric program trumps a dynamic one in functional results anyway, so why waste your time unless you’re a physique competitor?
I won’t spend any more time on this category of exercises because I honestly don’t think it’s worth knowing any more about. Just know that if you’re doing core exercises where your spine is bending, flexing, and rotating like a wire coat hanger at some point it will break just like that hanger.
Here’s some examples of some dynamic core exercises I don’t recommend using:
- Russian Twists
- Traditional Sit ups
- Side Bends
- Bicycles
True story: I was approached to write an article about how to pass the general fitness test for the armed forces, so naturally, I did some research on what exercises were included in the test.
- Sit-ups
- Push-ups
- Running
I told them I couldn’t write the article in good faith because I really don’t believe that showing people how to do traditional sit-ups until failure is in the public’s best interest. Here’s a great article explaining why I don’t like sit-ups.

STANDING CORE EXERCISE
Standing Core exercises are really where we need to ditch the term core. Instead, let’s say we’re training the pillar system to stabilize so the other joints in the body have full, pain-free range of motion.
What is stabilization?
Stabilization is the body’s ability to be in the desired position, at the the desired time, with the desired tension. Sounds confusing, right? It’s really pretty simple.
If you are holding a desired position like a plank, then hold it…don’t drift. This is an example of static stability. However in sports and life, we require dynamic stability as well. This is where we can keep our body in the desired position, at the desired time, though the desired movement. Consider throwing a baseball, if we held our pillar in the same manner as a plank we wouldn’t be able to move. We would be a statue!
It’s a concept that you may have heard of, but don’t understand. It’s called “Proximal Stabilization before Distal Mobility.”
Let me break it down for you. And you may have to read this section of the guide a few times to understand it, but once you do, it will lead you to a few important conclusions.
#1: You don’t need to stretch muscles or joints as much as you think.
#2: A functioning pillar allows for the hip, shoulder and other joints to have better “flexibility”.
I know it sounds crazy–don’t stretch a tight muscle or joint?! Unless you’re going to read the research, you’re going to have to trust me on this one.
Here’s a few resources if you want to go deeper into it:
Now that you’ve read the literature, we agree that we need our pillar to have appropriate stabilization at the appropriate time if we are to use our arms and legs in athletics, fitness and life. If your lat is tight, don’t jump right to the stretches.
Instead, try some of the exercises on this list:
- Loaded Carries (Farmers, Suitcase, Rack and Waiters)
- Wedging (Front and lateral)
- Goblet Squats
- Single Arm Kettlebell Deadlifts
- Turkish Get-ups
- Kettlebell Windmills
I see shoulder pain cases in my clinic often. You probably know someone with these exact same symptoms:
- Pain when sleeping on the shoulder
- Worse with reaching behind the back
- Worse when reaching above their head
- Non-traumatic

Nearly all of these patients come in asking for some type of soft tissue work or stretches. If they test poorly for pillar stabilization, I never start them with a stretch. I start them with some stabilization exercise instead. Here are my first go-to’s:
- Kettlebell Arm Bar
- Farmer’s Carry
- Suitcase Carry
- Birddog (Arm portion)
- Serratus Wall Slide (credit Nancy Newell)
Typically, after doing the first three stabilization exercises we’ll have significant improvement in pain-free shoulder range of motion. By significant, I mean they’ll have a 50% decrease in symptoms compared to when they first came in. Why does this happen?
The first three rehab exercise choices primarily work on stabilizing the pillar while we move the shoulder joint properly. If you’ve forgotten what the pillar is, I described it in the beginning of this article.
By providing stability to the pillar, we are allowing the following cascade of events to occur:
- Proper alignment of the lumbar spine (low back)
- Proper stacking of the mid-back (thoracic spine)
- A proper attachment for the shoulder blade muscles
- The shoulder blade can move through its range of motion with proper support
- A proper functioning shoulder blade allows the shoulder ball and socket to work better
- This equals less pain with shoulder motions
If you don’t believe it, you should try it.
Important section (click links to read immediately):
THRESHOLD TRAINING
This is where the magic happens. This is where the quality of your pillar training becomes extremely important. If you perform any of the exercises I mentioned throughout this guide with poor form, your norm will be to have poor form in life. Remember we are training for life…proper form carries over to movement in everyday life. If you do it well for five seconds and then lose form for the remainder of the time (say 55 seconds), then you’ll also have poor results.

For 55 seconds you had poor form, forcing your body to compensate during that whole time. Compensation during a majority of your training time is what happens to many people when they shoot for targets like “time” or “reps.”

What’s the alternative? Train to your threshold.
Dr. Richard Ulm DC started the concept of Functional Capacity (explained below & via PODCAST HERE) from Vladimir Janda’s Lower Cross Syndrome and furthered by the work from Pavel Kolar. Dr. Ulm took the concepts of both and translated them to high performance movements and compound movements that we use in the gym every day.
- Squats
- Deadlifts
- Jumps
- Running
You name it. Every person has their point of poor reps with any movement or sport.
To better understand this, you need to understand these terms:
- Functional Capacity – movement reps/time in good form
- Functional Gap – movement reps/time in poor/compensated form
- Absolute Failure – point of muscle/body failure
- Threshold – The exact step, rep, or time you change from good form to bad
Here’s a video on the terms and concept if you’re having a hard time:
The reason I bring up this concept in this guide is because no matter how great your pillar functions, you’ll always hit the point of poor form (functional gap). It just comes later in well conditioned people.
If we can’t recognize the threshold for that movement (point of form change), then we’ll spend too much time training our body with compensated movements. Your minute of a plank in perfect form will be all for nothing if you spend another minute and a half in poor form (functional gap).
If you perform a loaded carry well for 30 seconds, but continue in poor form for another 45, then you’re training your pillar system to function poorly.
Why is this important?
- Higher injury risk
- More muscle tightness (hips, shoulders, neck, hamstrings, etc)
- Decreased mobility required for your sport
- Decreased running pace
- More energy required for same workouts
- Less energy transfer from your legs to your arms (throwing and striking sports)
- Less power in golf swings, batting, racket sports and throwing
The list can go on and on. Compensated movement patterns are a real thing.
We see it in the plank as back arching.
We see it in squatting as knee cave.
We see it in running as hip drop.
We see it in shoulder presses as shrugging.
These compensations occur because of early fatigue in some muscle groups (phasic) and not others (tonic). Absolute failure occurs when the phasic and tonic groups and their correlated neurology simply give out.
A great way to visualize common compensation patterns is by Googling the Janda model of tonic versus phasic muscles.

Tonic muscles are the ones that typically become tight in Cross Syndrome. These are the ones people will typically say they need stretched or massaged. Janda believed tonic muscles are primarily involved in posture.
Phasic muscle are the opposite; they’re the ones people forget about until a trainer or healthcare provider brings them up. Trainers will often tell you that your “X” muscle is “off”, but in truth, it’s not really off–it just fatigues quicker than the others. Janda believed these muscles to have the primary function of movement. Pavel Kolar expanded on Janda’s “posture versus movement” concept by adding that both groups need to work in unison to create high quality movement. Stabilization precedes movement.
Dr. Ulm expanded further upon this by recognition of the Extension/Compression Stabilization Strategy (ECSS). In a nutshell, he says our compensated movements, found within our Functional Gap, are due to the phasic group giving out and the tonic group still holding on for dear life. This ECSS where the tonic muscle group is providing inefficient stabilization that roots itself deeply in our development and neurology.
All of the muscles that “feel tight” are typically tonic muscles. They fatigue later than the phasic muscles. The theory of why this happens is deeply rooted within our human development. I’ll make it as simple as I can: our brain connects to the tonic group first during our development so that connection is stronger. When your form begins to degrade during movement, it is why this group takes over and still has some gas left in the tank.
In order to have a good rep, we need the phasic and tonic muscle groups to be functioning in unison.
Tonic Muscles above the waist:
- Upper Trapezius
- Pectoralis Major
- Pectoralis Minor
- Biceps
- Scalenes
- Subscapularis
- Sternocleidomastoid
- Muscles of Mastication (chewing)
- Forearm Flexors
Tonic Muscles below the waist:
- Iliopsoas (Hip Flexor)
- Rectus Femoris
- Tensor Fascia Latae (TFL)
- Piriformis
- Hamstrings
- Calf Group
Tonic Muscles around the “core”:
- Lumbar Spinal erectors
- Cervical Spinal erectors
- Quadratus Lumborum
Do any of the listed muscle feel tight on you? Many deconditioned people claim more than half of the list. On to the phasic, “inhibited” group…
Phasic Muscles above the waist:
- Middle and Lower Trapezius
- Rhomboids
- Deep Neck Flexors
- Triceps
- Deep Core
- Deltoids
- Forearm extensors
Phasic Muscles below the waist:
- Gluteus muscle group
- Vastus medialis (inner quad)
- Vastus lateralis (outer quad)
- Tibialis anterior
- Peroneals
- Toe extensors
Phasic Muscles around the “core”:
- Mid-back Spinal erectors
- Rectus abdominus
Have you been told by a therapist, doctor, trainer or website that one or many of these muscles could be the key to your pain, performance or training program? Many people with pain in the hip or back have been told to “turn on their glutes,” and people with shoulder pain are told to “activate their lower trap, middle trap and serratus anterior.” Sound familiar?
What’s the point?
Stop thinking of your body as parts. Your shoulders and hips don’t work independently of the pillar. The pillar can’t function without hip mobility. Calf cramps happen during running when the tonic system starts to do a majority of the stabilization. Just look at the list of tonic versus phasic muscles again.
Isometric and standing core training only improves your life if you train with perfect form. Training your body to hold off compensation by the tonic group just a little longer every training session can be extremely productive. Don’t work until failure each training session. Don’t train into your functional gap too often; flirt with the line, but be able to recognize your compensated movements.
How can we train to improve your threshold and control your ECSS?
I created a simulation video of how I train people in my clinic to bring more recognition of compensation at threshold. Notice, we take a break before we go too far into the Functional Gap. (COMING SOON)
I also included Dr. Ulm’s videos on how to shut off the ECSS tendencies.
PRIMAL PATTERNING EXERCISES
This topic goes a little bit more out of my area of expertise, but in an attempt to make this a comprehensive guide, I feel the need to include it. I hold practitioners who specialize in this type of core work in very high regard.
The general category I’ll use are primal movements since what we are attempting to do is find the missing developmental patterns that people have lost. Think of this style as building a pyramid: without the basic foundation, you can’t expect to have a stable top. Primal movements are the base of the movement pyramid.
As we develop into adults, we all go through the process of rolling, crawls, squatting, hollowing etc. These are examples of primal movements. Getting more advanced types of movements to stick requires us to do all of these first.

Think of it like this:
You have to walk before you run.
You have to crawl before you can walk.
You have to roll off of your back and belly to start to crawl.
Retraining primal movements can be extremely hard for many people; it won’t yield six pack abs, but it will result in midline stabilization of the pillar system, less pain, and more power in lifting & sport.
In the chapter on Threshold Training, we touch on this with the tonic, phasic and ECSS discussion. In training of primal movement patterns, we are training the phasic muscles to resist neuromuscular fatigue longer.
If you’ve been told your glutes are off, this is a good place to start. The phasic muscles’ neuromuscular pathway can become better conditioned through stimulation of neuromuscular patterning. Remember, we’re training a pattern, not individual muscles. The body works as one unit.
Here are some examples of primal patterns through Dynamic Neuromuscular Stabilization (DNS):
- 3 Month to 6 Month Baby Prone to RT2
- 4.5 Month Prone
- 3-4 Month Supine w/Mods
- 4-5 Month with Doctor Resistance
- Staggered Low Quadruped Reach (Doctor Assisted)
- Quadruped Crawl with Ball
- The Czech Get-Up
Here’s Grey Cook PT and Lee Burton PT talking about primal patterns…
Here’s Paul Chek’s discussion on it (2 Parts)…
As you can see by the ®, he has trademarked the term so I’d better discuss it as primal movement from now on. Thank you for all of your great work Pavel, Chek, Cook, Burton and anyone else associated with the development of these systems.
Note the practitioner’s cueing. Even I need a practitioner to assist me in doing these well. Don’t attempt them on your own until you’ve been coached a bit in the past month or so. They look easy, but are really easy to mess up too.
PILLAR TRAINING
The Pillar Concept of the “Core”
According to studies conducted by the world’s leading spine researcher, Stuart McGill, and Athlete’s Performance, we now include the shoulders and hips within core training through a concept known as “Pillar Strength”. You’re probably tired of hearing me say this, but the body can’t be trained in isolation. I’m going to keep saying it until I stop hearing people ask questions about how to train the core.
The region of the body now known as the “pillar” functions as the stable center of all arm and leg motion. Think of those old buildings from the Roman Empire. Those huge, white columns are what holds the house up! Take just one pillar away, and nothing would be left standing. Personally, I love the term “pillar” since the term “core” is misinterpreted so frequently. (PIC OF CORE VS PILLAR Coming Soon)
How is Pillar Training any different?
To have a high functioning pillar, we have to do more than just the standard old “core” training. We have to now take care of our hips and shoulders too?! Yep, and we have to learn how to transfer force from the legs through the pillar to the arms. This is how we throw objects. Allow me to break-up a few components of Pillar Training:
- Soft Tissue Care
- Mobility Work
- Stability Work
At this point, you may be extremely confused about how to properly train your pillar (formerly referred to as the “core”) and rightfully so. Over the years, the expert’s concepts of what is right has changed; sometimes we were on the right path, and other times we had to backtrack.
To start pulling these parts together, let me give an example of how I would program a pillar workout for someone without pain within the first week:
- Teach Intra-Abdominal Pressure (IAP)
- Advance them through Primal Movements while keeping IAP
- Throw in some Isometric Floor work with an emphasis on form, IAP and breathing for 10 second holds
- Move to Standing “Core” work below threshold
Where does pillar work start?
For my clinic, it starts as we teach how to breathe. Imagine the pillar–it’s an unbreakable rock. Teaching people how to create a solid, unbreaking pillar is number one on my priority list. Does the pillar system need to be in high tension at all times? No, but this is why we go into tension gradients… it’s all pillar work to me.
After they learn to keep the pillar’s integrity, we would then incorporate more complicated exercises/movements.
ANTI-ROTATION TRAINING
No pillar training program can translate to the field until you add anti-rotation training. Movement is governed by physics, and we move in three planes of motion. We need to absorb rotational forces in order to save our joints from injury and transfer power.
Anti-rotation is included when we cover pillar training, but it was given a spotlight when ACL prevention programs came on to the scene.
Anti-rotation or the slowing of rotational forces is extremely important in injury prevention programs for the lower extremity, but it’s equally important with power generation. Because it is such a performance enhancer, it should be incorporated into all athletic programs.
Here are some examples of anti-rotational work:
- Chops
- Lifts
- Rotational squats
- Medicine ball tosses
- Cone drills
- Birddogs
- Single arm presses
- Sled pulls
- Sled pushes
As you can see, there’s a huge variety. Chances are that your coach or sports medicine professional is already putting some of these into your pillar program if they know what’s going on.
Like I said before, a comprehensive pillar training system addresses this. We must create stiffness in the torso to allow the hips to decelerate rotation and lateral forces that we find in change of direction sports like soccer, basketball and volleyball.
Since this deceleration occurs when shifting weight into one leg, it is commonly conditioned when the athlete has one leg loaded more than the other.
Sagittal plane exercise such as squats, deadlifts, bench presses, and pull-ups don’t account for this. Loaded carries, walking, and sprinting on the other hand, have rotational challengers built-in because we shift from one leg to the other.
RECAP
We’ve gone over a lot of information at this point and provided a ton of example exercises. The intention of this article was to get you thinking differently rather than to give you general exercises for building a six pack. Use some of the exercises with a fitness professional to go over form and cues. External cueing (by a bystander) has been shown to be better than assessing your own form–way better. If you’re serious about developing a solid pillar system, you need to get some direction…even I needed direction.
If you would like some direction from me when my pillar training program is live, it will be linked right here.(LINK)
Until then, read my article on low back pain which will go into more detail about how the torso works.
– Sebastian Gonzales DC, DACBSP, CSCS